Lighting systems and uses
Lighting is one of the most important aspects of an image, it can either make or break the look of a scene. It is important to understand how lighting systems work and when we can use certain systems and when not. The theory of lighting and rendering is described in multiple books but from theory to practice, there is a long road of trials and fails until the concept is well mastered.
Understanding lighting systems is very important in order to create a photorealistic scene or show off a 3D model. Good lighting can make the difference between an intermediate artist and a novice because it is essential to present all the hard work that was put into our final scene.
In this article, multiple types of lighting systems will be presented along with image references. The first part will present 3D model lighting techniques, the second part will involve scene lighting techniques and at the end, environment lighting techniques.
Lighting techniques for 3D models:
Many books, articles and video tutorials refer us to the basic “3 point lighting system” which is very useful but, in order to understand and apply it efficiently, we need to go into more details.
In this category we also have the 1 point, 2 point, 3 point and even 4 point system lighting. Which one is used depends on the type of mood we want to set and what amount of detail we want to show.
- 1 point system lighting.
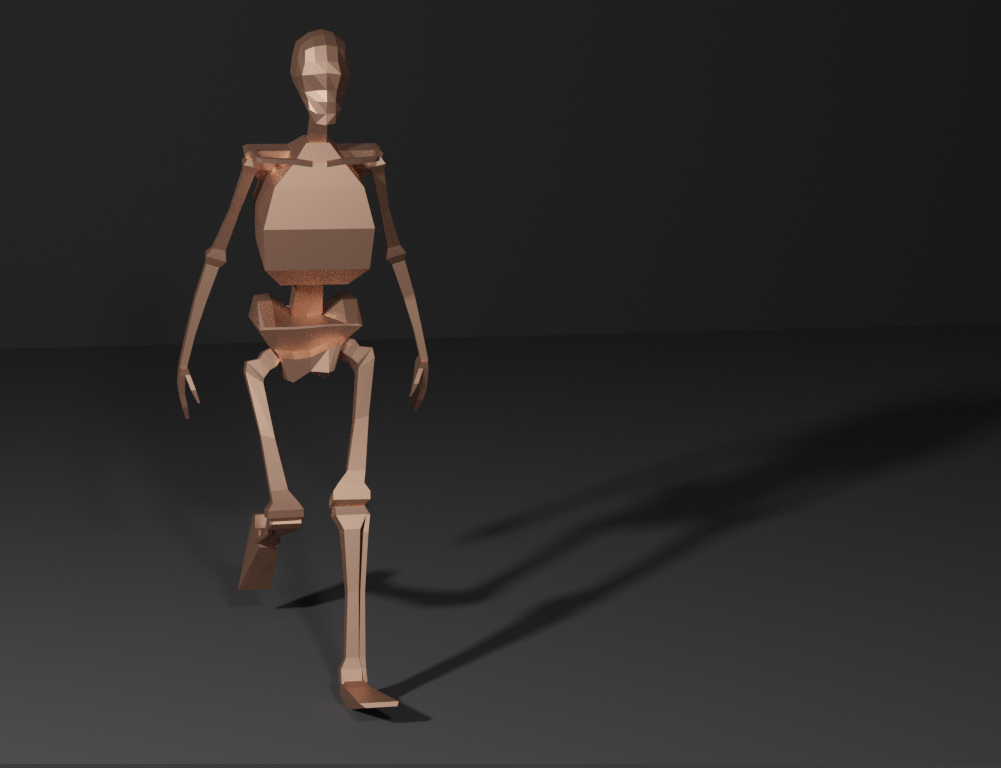
As the name states, there is only one light illuminating the 3D model. The angle of the lighting is important as well as it sets the mood of the scene. The light used is known as a “Key Light” and is positioned at a 45 degree angle from the camera and is the brightest one in the scene. An example of this are presented below:

In this image, the silhouette of the manechin is displayed with the help of the Key light. The lighting, combined with the dark background, provides a sombre atmosphere to the character. The harsh shadows that cover half the face of the manechin adds to the tension as well. We can achieve different looks of the image by adjusting the colour of the background and the pose of the manechin. At the end of the day, it all depends on the message that we are trying to convey to the viewer.
- 2 point system lighting
In this system, we add an additional light source, a “Fill Light”, in order to bring out certain details that are not visible just by using one light source. This type of lighting can show off the level of detail on the model. The light is positioned parallel to the Key light and is less powerful.

The Fill light, as its name implies, helps fill in the darker crevices with light and lets us have a better visual understanding of the manechin. From the image shown above, we can have a more clear view of the left side of the manechin.

- 3 point system lighting
The most common and efficient lighting system uses a Rim light, a Fill light and also a Backlight, which is positioned at the back of the 3D model, facing the camera. The Backlight is less powerful than the other lights as its purpose is to highlight the general shape of the 3D model. This type of lighting system is also known as studio lighting. It is common to use planes as emissions in order to have a better control of the amount of light emitted, the shape of the shadows and the color of the light.
By using all three lights in our scene, every detail of the manechin is visible. The back light helps illuminate the small details such as the pelvis region of the manechin but also the shoulder area.
- 4 point system lighting
This system is used when a certain area of the model is still too dark or unclear. In order to avoid overlighting the rest of the scene by increasing the power of the 3 point lighting system, an additional lamp is placed to highlight the details in the needed area.
Scene lighting systems:
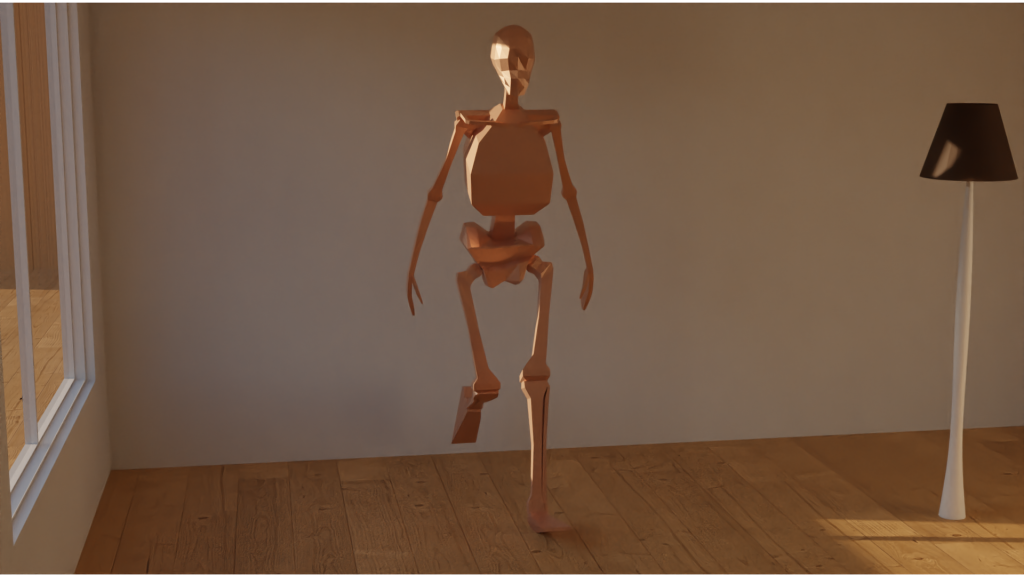
Whether it’s an indoor or outdoor scene, the lighting is very important because it gives the necessary amount of detail and atmosphere. In this situation, the following types of lights can be found: sun light, area light, spot light, point light. It is best to use multiple lights in one scene because it can avoid hard shadows, unlit objects and uniform, bland lighting. For most indoor lighting scenes, a sun light is used to cast a ray of light inside the scene through the windows or opened areas. In the following image, the manechin was placed in an interior scene that was illuminated with the help of sunlight.

The strength, colour and position of the sunlight can be adjusted with ease in order to create the desired look. The only drawback to this method is the inability to cast soft shadows and control with accurate precision the dispersion of light throughout the scene. This can cause issues in case we would like to create a realistic looking scene because a part of the scene will be well lit and the other remain dark due. As well, the scene has a high amount of noise that will take time rendering in case we need a realistic aspect to our render.
To compensate for the dark corner, a lamp was placed with two spotlights. In the following image we can see that the manechine is a bit more illuminated. One disadvantage is the unrealistic look of the scene. Normally, when using a sunlight we wouldn’t need interior lights to brighten up the room especially so close to a large mirror. One solution for the non uniform lighting in the scene is to use additional area lights in the scene to illuminate the dark areas but when we are dealing with multiple light sources, it is tricky to adjust them properly in order to create an overall light setup that can be similar to the real world.

For a uniform distribution of the might in the entire scene it is best to use an HDRI. An HDRI is a high dynamic range image used to reproduce an physically accurate range of illumination in a 3D environment, which we will discuss right now.
Environment lighting systems:
Nowadays, it is very common to use an HDRI to illuminate the scene and while this is very efficient in evenly lighting the scene and create realistic shadows, it is sometimes difficult to find “the right” HDRI that can satisfy all our requests. Even so, the results are very pleasant. The scene is properly lit and the shadows are more soft and realistic.

A common problem is the strength of the sun in the scene. When increasing the strength in the word settings, not only is the sun itself more powerful but also the light that is reflecting off the clouds from the sky and the surroundings. The end effect can be too powerful for the overall look of the scene. To avoid this, a sun light is used and orientated in such a way that is similar to the sun from the HDRI to compensate and brighten the subject of the scene.
The sunlight can be oriented in the same direction as the sun in the HDRI but it can also be controlled more easily without changing the overall aspect of the scene. The colour of the sunlight can as well be changed so we can achieve the specific look that we want.
These are some of the techniques that can be used in a multitude of situations but it is important to keep in mind that the quality of the final render depends on not just great lighting but also good modeling and composition. All three are important and need to be mastered in order to create a good quality final image.

